We live in a world where there are not nice people. I can attest to that, I’ve been though a few not so nice things in my life. I live in an area that has gotten steadily worse over the years, and I don’t see it getting better any time soon honestly, it was at one time a very nice neighborhood. It’s time to move my family to somewhere a bit nicer I think, but houses cost a lot of money, so it’s not going to happen right away. In the meantime I’ve got to protect my family and our stuff. For example before Christmas someone stole my 5yr old sons bicycle from right off of our porch, sadly my wireless camera was disconnected at the time. Now I have two on my front porch, one that looks at my steps and cars and one that views the porch and steps. In the years we’ve been here I’ve had my cars keyed, egged, hit by other cars, mirrors knocked off and even hit with paintballs and I’m just sick of it, wouldn’t you be? I lease my cars, every couple years I get a new one and apparently people don’t like to see someone get a new car, they have to ruin it out of jealousy I would guess. It’s not me, I’m a professional blogger, I work from home and don’t bother anyone. The houses on either side of mine are either empty or every few months someone else moves in so I don’t have time to make friends with them, just how it is I guess. Those that do move in aren’t what I would call trustworthy or very respectable, I have had many things go missing from my gated yard. They just wander in and take what they want. I’m tired of it, tired of having to re-buy things that were mine to begin with. Now I’ve got cameras monitoring things 24/7 along with a security system on my home and even bars on some of the windows, call me paranoid but I’ve been through and seen enough to know there’s people out there who aren’t very nice and my family needs to be protected any way I can.
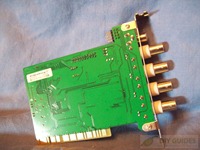
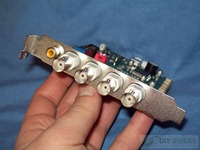
So you’re going to be seeing a lot of me and my reviews over the next few days and weeks and a lot of it will be security related. Today for review I’m taking a look at a budget security DVR card from a company called VideoSecu. This PCI card can be bought for as little as $30 plus shipping on Amazon, and I was very skeptical about it. I have experience installing camera based security systems that run into the tens of thousands of dollars with just the PCI DVR cards themselves costing over a thousand each. The card I have today features four BNC input connectors for cameras and then a composite video output as well and it comes with a nice suite a software. I’ll be honest I’m impressed, it’s not what I was expecting at all in this price range. If you’re looking to setup a security system and you’re on a very tight budget then this might be something you should seriously consider. There is of course the cost of cameras as well, but we’ll get into all of that later, for now I’m just looking at the card itself and the software that comes bundled with it.
VideoSecu 4 CH DVR Video Capture Card 30 fps
Model: DVC403
Price: $30-$60 (Depending where you search)
E Series Network Video Recorder (NVR) kit delivers superior image quality, and the most comprehensive feature set available. All through an intuitive graphical user interface. The E series NVR pentaplex functionality provides simultaneous recording, monitoring, remote streaming, archiving and reviewing.
Features:
Recording Modes
Motion Detection: Records whenever there is activity Continuous: 24 hr Recording Event: Automatically records when alarm inputs are triggered Pre-Alarm Recording Dual Mode (Continuous / Motion Detection): Allows recording by specific time
Pan-Tilt-Zoom-Sharpen & Blur
Once you’ve recorded video, you can view it in the player as most DVR’s do, however the E Series innovates with a pan/tilt/zoom feature within the recorded video, and even allows you to zoom in on an object and Sharpen or Blur it for detail. Now you can ZOOM into a suspects face and then sharpen his features for printing or dubbing.
Video Quality/Clarity
Nothing we’ve ever seen even comes close. Absolutely STUNNING video quality EVEN across the internet via the client software OR the Web Browser. Running 640×480 in it’s highest quality provides an image that simple leaps off the screen for you.
Individual Channel Controls
You can adjust each camera’s recording speed, viewing speed, quality, etc. Each camera can be set for time record, motion record or full time 24/7 record. You may also adjust up to 8 individual Audio Channel Settings for crystal clear audio, even across the net.
Record Duration and Storage
Eye DVR is designed to record thousands of hours of continuous full frame video. Recording time is only limited by the amount of Hard Drive space. When Hard Drives become full, the oldest data is automatically deleted and the new data is recorded in its place , all without any additional management time to maintain the process.
MPEG4 (Motion Pictures Expert Group) Compression
E series uses MPEG4 compression algorithms to provide the highest quality compressed video. MJPEG technology is the most effective method available relating to image size and image quality. MPEG4 compression surpasses other compression technology like, MJPEG, MPEG2, H.263 and H.324 and Wavelet compression. Net record an average 1-2 k image size and deliver outstanding security quality images when enlarged. Example: A Wavelet 16-24K file equals the same Quality as Net’s 2K file.
Digital Watermarking
Digital watermarking can be selected for recordings. Any recorded video exported from the original hard drive recordings are thus ensured to be unedited. This is a particularly important point when video is to be used as evidence in court.
System Control through Remote Access
NVR fully support remote access and control of all of its functions via ordinary telephone line (PSTN), ISDN, DSL and TCP/IP. Thus, providing a cost-effective solution for any security and surveillance application. Simply install the Remote Software on a any PC (with 1024×768 Display) and you can view any remote site and control any of the DVR functions or cameras at any time. All settings and configurations of the Net can be saved and restored from the remote software. .
Web Server Application
Your DVR Can Serve as a web server with a single mouse click, no additional software to install and configure. Can be used either with a static IP or a dynamic IP. You can choose various levels of user control up to and including COMPLETE control via the browser. You may also turn off the log-in requirement and simply stream to the web with no username or password required of your viewers.
Simultaneous (Multiplexing) Operations
NVR ‘s can perform several simultaneous operations: Live Local Viewing, Live Remote Viewing, Recording, Local Playback, Remote Playback, Local System Configuration, Remote Location Configuration and Saves (copies) video to removable storage devices.
PTZ (Pan/Tilt/Zoom) Controls
Controlling PTZ camera is as easy as clicking a mouse. This PTZ feature allows you to pan/tilt and zoom for a closer look. Even if the operator is at a remote site, the operator of the remote location manipulate the PTZ controls of any camera. Each Camera can be a different Manufacturers P/T/Z.
Spot Monitor output
Each Card has a composite OUT to a standard CCTV or TV Monitor. Additionally, you can control WHICH cameras you want to spin to the composite, at what intervals, etc. This function is fully addressable.
Password Protection
Passwords restrict the operators access to the programmable features of the NVR ‘s and allow program termination to be controlled only by authorized personnel.
Searching Recorded Data
NVR’s break recording data into charts so users can effectively see where recording has occurred on each camera at what time , Smart search is also supported allowing users to zone of an area inside of camera and only playback data that was detected in the selected area saving users hours of time looking for incidents.
The VideoSecu DVR card is a budget card so there’s no fancy packaging at all, just a plain white box and inside is the card and a mini-CD with the drivers and software on it. The user manuals are on the disk as well, so there’s no printed manual included.
The card is the PCI variety and it feature four BNC connectors and a composite video out connection.
On the end of the cad you’ll see two connections PC Reset and Reset Switch, the card can reset the PC if needed. There’s another connector on the top edge, but it’s just labeled JP4. The user manual is no help really, it’s very very comprehensive in regards to the software but there’s no pictures of the card in the manual to tell you what things really are.
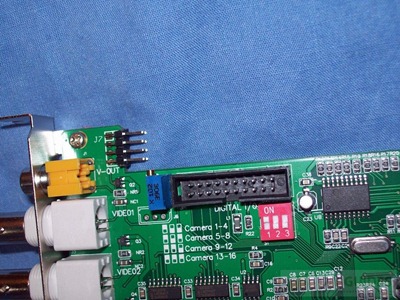
Towards the PCI bracket you’ll find a digital i/o header, a set of jumpers for the cameras and another set of pins which are labeled J7 and again I have no idea what they are for. The jumpers enable you to use up to four cards in your system at the same time, you set the jumpers for which cameras the card is monitoring like 1-4 or 13-16 and so on, it’s sort of an identifier basically.
Honestly in a basic security system won’t need the extra connections, so I don’t think it’s that much of a problem really that we don’t know what they are. Plug the card in and hook up the cameras and you’re set really, and that’s what the card is being used for by me and most people will do the same I think.
For a DVR computer system you really don’t need an uber-powerful computer, it’s just recoding video essentially, but you do need storage space. I installed the card in my AMD Socket 754 based system on a micro-ATX board in a very small and cramped case. Yes it’s a SKT754 system, so it’s old by PC standards but it’s just right for a job like this.
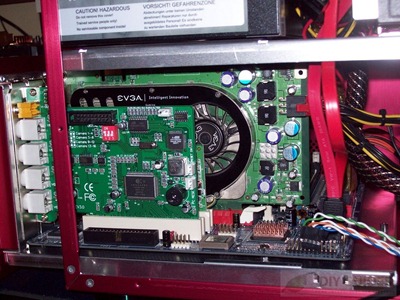
Here it is in my system:
My motherboard only has four slots, two PCI, one PCIE and one mini-PCIE slot and all are filled now. Behind the DVR card is an 802.11N wireless network card if you’re curious.
Installation for the most part is easy, pop the card in and install the drivers and software. It does take time though, a few hours really to complete the installation because I used a 750gb hard drive and the software converts it to the DFS file system. It will take longer or shorter depending on the size of your hard drive and how much space you allocate to the security system.
If you look on Amazon you can get this card and software for $30 plus shipping, about $40 basically. If you go to the VideoSecu site it’s $60 plus shipping, but it is the same thing. As I said earlier, I’ve got quite a bit of experience installing video security systems that cost tens of thousands of dollars, for example just a good DVR card can cost over $1000 and that’s just the card and software. Knowing that I wasn’t expecting much from this software and card honestly but I was pleasantly surprised once I started using it.
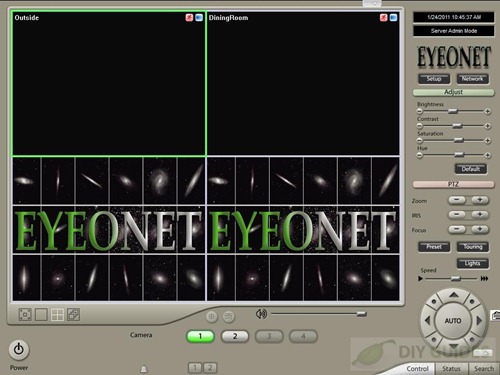
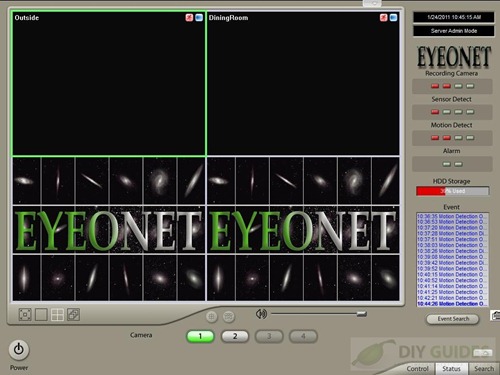
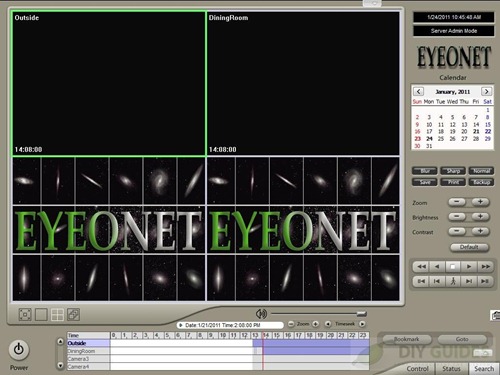
The screen capture I used wouldn’t capture the live video for whatever reason, but the two black screens you see are live video feeds from two different cameras. Don’t worry though I’ll have a sample for you towards the end here, but these blank video screens are good actually because tomorrow I’ll be posting a review of a pinhole security camera that is on channel two of this card. So the black screens won’t give anything away.
If you read the plethora of features listed above then you’d know this card/software can do a lot of things. When you turn on the software you’ll have to enter a password, there is none at very first boot, you’ll have to set one of course.
The main screen shows four channels which can be changed to single view, full screen or all four full screen via the buttons on the bottom beneath the monitors. There’s a power button in the bottom left corner that will exit and minimize the system, but it’s password protected as well. Most anything you do requires a password, this a actually a great feature as no one can then change any of your settings. To the right of the power button you’ll see oval buttons numbered 1-4, these are the cameras, they’re grayed out if not in use and the colored green one is the active one at the time. To the left of the monitors you’ll find a lot more buttons for controls, at the top are Setup and Network, then below that are sliders for adjusting Brightness, Contrast, Saturation and Hue and then reset defaults. Below those sliders are the PTZ or Pan Tilt Zoom controls if you’re using a PTZ camera. The camera I’m using is not PTZ enabled but it is a professional grade rather high end Sony that I have mounted outside, it’s a vandal dome style that cost about $500 when I got it several years ago. So no PTZ for me, but I plan to get one eventually as they are very useful and fun honestly. At the very bottom on the left side are three more buttons labeled Control, Status and Search these are the actual control panels of the DVR system which you’ll learn more about shortly.
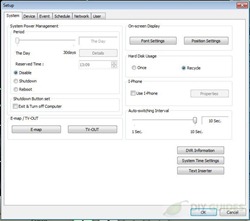
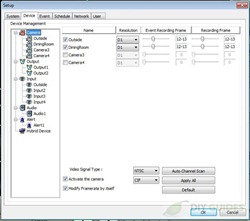
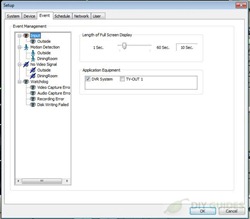
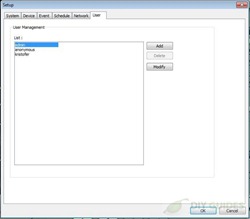
Before we go on I wanted to touch on the Settings, there are six pages of them to be exact. The tabs are System, Device, Event, Schedule, Network and User. You can click on them to see a larger view. The first page is all about the system of course, time management, fonts, tv-out etc. The next page is about the cameras, the next is events and where you can set motion detection. You can fully configure up to six areas for detection. The next is called schedule, here you can set the camera for when you want them to record, ever day or only certain days or certain hours. The network setting is up next, kind of self-explanatory. The last page is Users, here you can add users and set passwords and set permissions.
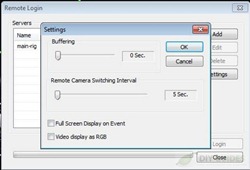
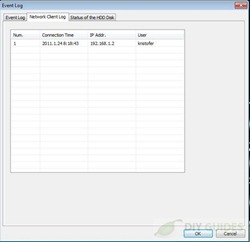
The other tab on the main page is Network, not much here really just who logs on and you can set buffering and switching.
The next main page would be called Status the cameras are here again with their live view. Here you’ll see ‘lights’ for Recording, Sensors, Motion Detections and Alarm. Below that is the Hard drive storage status, and then a list of events.
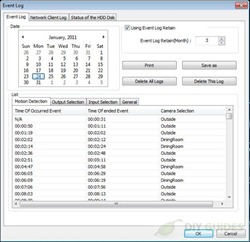
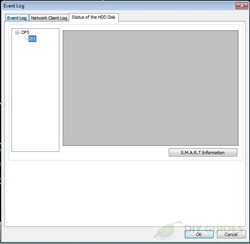
Under the listing of event you can click the button for Event Search and here you can search events and see what’s going on or what went on and when it happened. The last tab is Status of HDD Disk, but for some reason it couldn’t read mine, not a big deal though to me at at least.
The page is just called Search, here you can view the videos at any time or date. It synchronizes them as well so let’s say at 2pm on Wednesday you can see what was going on with all of the cameras at the same time. There’s a little Calendar and you can pick the date you want to view. Below the calendar you’ll find six buttons for Blur, Sharp, Normal, Save, Print and Backup. The first three are for viewing and then there’s slider below to Zoom, Adjust Brightness and Contrast. Then there’s the play, pause etc controls there as well.
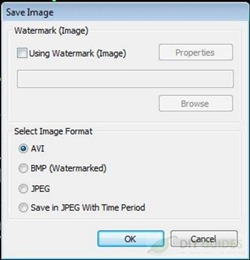
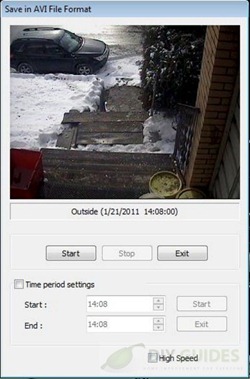
When you click the Save button you’ll be given choices for AVI, BMP (Watermarked), JPEG and Save in JPEG with Time Period. The interesting thing is that when you save the video it’s actually it’s own built-in video player. Then you can choose whether to save the entire things or only a certain time frame. On the saved videos you’ll see the titles and the time as well. You’ll also see a sample picture from my camera which needs adjusted a bit, I need to move it to the left a little, and I should have moved the recycle bin and buckets of rock salt out of the frame, but oh well.
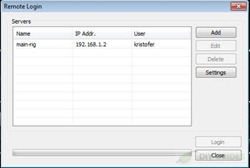
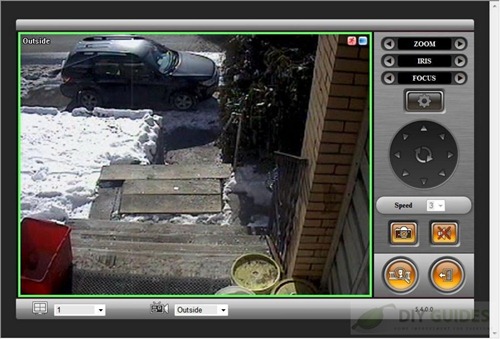
You can remotely login from your home network or even if you’re away. You do have to use Internet Explorer as I couldn’t get it to work correctly with FireFox. I monitor it over my home network, I’ve got four monitors and I let it share the screen with my email so I can see what’s going on outside. The remote view let’s you take Snapshots and you can search along with PTZ features if your camera can do it. I found a small bug though, you can’t login remotely with Admin access if the Admin is logged into the main program, it just doesn’t let you. Not a big deal though as you can see what’s going on and still take snapshots without admin access. In the top right corner of the live view you’ll see two small icon, one red one that looks like a little guy running indicates motion detection, while the blue one that looks like film indicates video.
I like all of it really, but there is one complaint and that is there’s no times at all shown on any of the live views, but it is there when you save it. It could be that I was just accustomed to seeing the time there on my old system as well.
In my time with this software I’ve come to like it, it’s simple to use and it seems to work very well. I haven’t had any crashing or locking up or anything like that, it just works fine. I’m impressed truly, I was not expecting much of anything at this price point really. I was honestly expecting a buggy piece of junk that I was going to do nothing but complain about and probably throw away, but no I’m going to continue using it, until the next one comes along anyway!
The card might be inexpensive but you have to remember it’s PC based so you’ll need a computer to run it with enough storage for your needs, so there’s plenty of things to factor in.
For the price this could be the base of a fairly decent home security system, but you have to remember the card and videos are only as good as the cameras used with it. On that note be sure to stop back tomorrow to see my review of a $13 video camera that I used with this system. You’ll probably be just as surprised as I was with it.




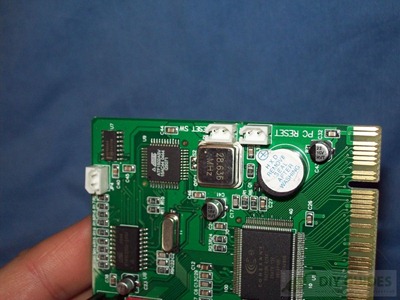



FYI – After doing some testing I can tell you that the JP4 Connector is the audio input jumper.
can this record more then one cam at a time